

Have you been dreaming of a place where you can store or work on your cars, motorcycles, or other vehicles? Well, there’s no limit on uses when you choose to build a pole barn garage!
- Do you need to store summer or winter toys in the off-season?
- Are you looking to build out a man-cave with big screen to watch the game while tinkering on your projects?
- Maybe you need a shop with a lift to restore classic cars or motorcycles?
Whether you’re starting a home business or need a place for the lawn mower and gardening equipment, there are a few things to think about before you purchase your post frame garage kit and start building. Browse these tips for the basics and feel free to contact us if you have questions!
Tip 1: Post Frame Garage Building Options
How you plan to use your pole barn garage will determine the size you may need to work comfortably. But to get you started, let’s look at a basic structure that will accommodate cars and trucks.
Structure Dimensions
If you are looking for a building that can accommodate the storage of cars or trucks, we recommend a minimum size of 12’ x 24’ per bay with a minimum door width of 10 feet. This will give you enough room for storage and to move around, but not really a workshop. To move past storage and into a full-fledged shop, we recommend an additional 12’ on the width of the barn, making the structure 24’ x 24’.
Of course, if you want an additional bay, that extra space will get eaten up quick! For a two-bay pole barn garage option with storage or shop space, we recommend a minimum 24’ x 32 structure.
Can a Post Frame Garage Kit Store Larger Vehicles?
Of course! One of the most popular reasons to go with a post frame garage is scalability. The potential for a large building, with a massive main door and big space inside is often why our customers come to us.
Post frame garage kits can be used to store anything from your lifted truck, to your 30’ RV, to your agricultural vehicles. Our designs can be built big, so don’t worry about having enough room!
If you’re thinking of a pole barn for an RV, learn more about how you can plan your design!
Door Options
When it’s time to select doors for your post frame garage, you have many options.
Width – A standard overhead door is 9’ wide. However, if you are working with full-sized vehicles you may want to consider a 10’-12’ door in order to comfortably pull in and out. If you are working with or storing small items, such as ATVs or motorcycles, custom doors can be ordered in narrower widths for an additional cost.
Height – If you are looking for RV storage or other items that require more height, residential overheard doors are available in most widths up to 14’ tall. This will accommodate most road-legal vehicles.
Types of Doors
When it comes to putting the door on your post frame garage kit, you’ll need to make a big decision by choosing the type of door you use. For post frame buildings there are two main types of doors: the sliding door or the overhead door. Each has its own benefits, potential drawbacks, and other considerations.
Choosing the type of door for your post frame garage kit requires you to understand the value of each.
Sliding Doors
The traditional door of a post frame building, sliding doors are still popular even today due to the variety of benefits they offer. Adding a sliding door to your post frame garage kit lets you enjoy:
Lower Cost – Sliding doors are pretty simple in terms of operation. They’re mounted on a rail that allows them to slide, and that’s the primary mechanism for use. This means the materials to produce, and the effort to put them up, can be relatively easy and low cost. When trying to save money on your post frame garage kit, this can be the sole deciding factor for many.
Long-lasting – Simple designs also tend to be the most durable. After all, the fewer moving parts that go into a door, the less opportunity there is for mechanical failure. Sliding doors can be a durable option that lets you set up the primary door for your garage kit and then forget about it.
There are some drawbacks to the sliding door, too, that are worth mentioning:
No Seal – Sliding doors need to be able to move freely without friction against the ground or sides. That means they aren’t going to seal in your post frame garage when closed. That means it’s open game for animals to sneak their way in. Likewise, temperature control inside your garage becomes challenging.
Manual Operation – While you can probably find automated sliding doors, they’re not very common. Which means you’ll be working with your door the old fashioned way! As you use your garage more frequently, you may find that hopping out to close the big barn door can get frustrating compared to simply hitting the button of an automated one.
Overhead Doors
Your other big option for your post frame garage kit door is the overhead door. Despite sliding doors being more traditional for barns, it’s fair to say the overhead door is the traditional option for garage kits.
Like sliding doors, overhead ones for pole barn garages come with their own pro’s and con’s:
Automated – The biggest benefit of overhead doors are that they’re commonly built to be used with automatic door openers. For a garage kit, that’s often a make-or-break decision. After all, do you really want to be hopping out of your car every time you pull in or pull out to close the door manually?
Insulated & Sealed – The other big plus for overhead doors is that they offer your post frame garage kit more protection from animals and the elements. Insulated overhead doors are easy to find for your garage, which means better temperature control. Additionally, most overhead doors provide decent level of sealing for your garage.
But what about the con’s? Here are some of the reasons you may not want to go with an overhead door:
Cost – The biggest potential drawback of an overhead door is the price tag. Overhead doors and the automated systems for operating them are always going to cost more than an identically-sized manual sliding door. If you want to save a few bucks on your garage kit, an overhead door might be the place where you draw a line in your budget.
Maintenance – Again, due to the addition of mechanical systems for operation, there is some maintenance required to go with your overhead door. That means extra costs down the road, especially if you get an inexpensive model that isn’t reliable.
Tip 2: Windows & Ventilation
Now that you know the general size and layout of your post frame garage, it’s important to think about proper ventilation. Not only will this make your time in the barn more enjoyable, it will help to avoid moisture accumulation, mold, and mildew that can form on the underside of the roof sheathing and trusses if not properly ventilated.
Vents
If you are considering a more finished look on the inside of your post frame garage, with a flat ceiling that also creates an attic space, then you should consider adding a vented ridge and soffit vent at the time of construction.
How it works – Warm, moist air from inside rises, passes through the attic, and escapes through the vented ridge at the highest point of your building. Next, the air that has been expelled will be replaced by outside air coming in through the soffit vent. This keeps your airflow and moisture at the right levels in every season!
Windows
When it comes time to select windows for your pole barn garage, think about not only the aesthetic aspects, but also functionality.
Double pane insulated windows – If you plan to insulate and heat or cool your pole barn garage, then a double pane insulated window will be the best option to help keep your work area climate controlled and energy costs down. Don’t forget to consider insulated overhead doors for even more energy efficiency!
Single pane windows – To keep costs down, you may opt for single pane windows in a cold storage post frame garage.
Layout your window and door locations in a way that maximizes your interior space, is visually balanced on the outside for a pleasing look, and contributes to a cross breeze if your space will not be climate controlled.
Tip 3: Flooring & Drainage
A post frame garage or workshop typically has a concrete floor to give you a better working surface and keep things nice and neat. Keep these tips in mind when you are working with your flooring contractor to ensure a quality product and proper drainage.
Site preparation – Make sure you prepare your site (or talk with your contractor) in a way that will save you money when it’s time to pour your concrete floor. Remove all sod, bring in sand fill if necessary, complete a rough grade so the area is somewhat smooth (you or your concrete guy can do the final grade), and make sure there are several access points for a concrete truck to reach your site!
Thickness – The industry standard for a residential pole barn, where you are storing lawn mowers, toys, or regular vehicles, is reinforced concrete floor that is 4” thick. If you have heavier equipment, you may want to consider flooring up to 6” thick for better wear and tear.
Drainage – For water run-off or melting snow, a regular floor drain with tile running to the exterior of the building will probably be sufficient. However, if you are looking for a more substantial drain system, you may want to consider a quality trench drain built from concrete and with a grate.
Tip 4: Plan Your Look!
One of the best parts of adding any new building to your property is making it look great! A garage is going to be a big part your homestead. It will stand out whether you’re building it on a small residential lot, as part of a commercial structure, or even on a massive farm. You’ll want it to look its best.
DIY Pole Barns makes it easy to dial in the exact look and feel of your pole barn with our pole barn colors preview. Just select your state to get started.
Our color tool lets you conceptualize your color combinations for your barn. It’s about more than just picking “red barn” or “blue barn” too. Our tool lets you individually customize the roof, siding, trim, a sliding door visual, and wainscotting.
We offer a variety of color options to help you match your garage kit to almost any home or existing building look, too. With nearly 20 colors to choose from, you’re sure to find a few options that look great to you!
Tip 5: How to Organize Your Equipment & Tools
When your pole barn garage is complete, the best part begins – filling it with your stuff! Make sure you start out right with an organized work space to save yourself the hassle of tripping over tools.
Keep items off the floor – It’s important when you start organizing to use your wall space wisely. Hang everything you can, from hand tools to gardening equipment from peg board, hooks, and racks.
Save space with a folding workbench – If you’ll be tinkering on vehicles in your pole barn garage, you might consider a workbench that is attached to the wall on hinges and can be collapsed when not in use. This option gives you more space where you need it most – on the shop floor.
Look up – Don’t forget to take advantage of the space above your head for storing seasonal or infrequently used items, such as inner tubes, kayaks, large ladders, etc.
Bonus Tip! Rodent Prevention in Your Pole Barn Garage
Did you know that not all metal pole barns are created equal? Make sure you examine the skirting of you kit to ensure there are not access points for rodents! If you discover that you’ve overlooked this important feature, add flashing.
Also, remember insulation is like a cozy nest to your furry invaders. Never add a second layer of insulation over an existing one, as it provides a comfortable mouse habitat and can lead to condensation issues with the vapor barrier.
Get Started with Post Frame Garage Kit Inspiration
At DIY Pole Barns, we do more than supply the materials. We’re here to help answer your questions and get you started with your design to ensure the final result is something you’re proud to have on your property.
Visualizing the post frame garage kit of your dreams isn’t always as easy as you might think! But don’t worry – we have a gallery of beautiful pole barns to look at along with some additional information that can help you get an idea of what you might like to see in your unique barn. Take a look at our pole barn garage inspirations!
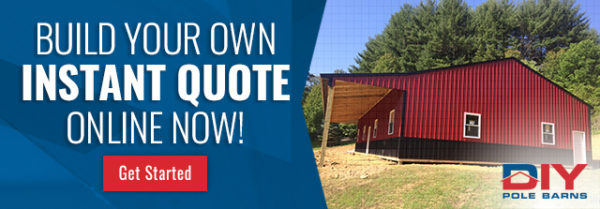
Lock in a Quote for the Pole Barn Garage of Your Dreams
If you’re ready to build your pole barn garage, lock in a quote with DIY Pole Barns using our Instant Quote tool! Have questions? Call our knowledgeable staff at (937) 547-9100.