

From garages to workshops and commercial buildings, pole barn framing offers numerous benefits for a wide range of applications. In this guide, we’ll explore everything you need to know about this building technique, including its definition, applications, pros, and cons, and more.
What Is Pole Barn Framing?
Pole barn framing (also referred to as pole building construction and post-frame construction) is a building technique that uses large posts, or poles, as the primary support for the structure. These posts are usually buried in the ground and can also be anchored to a foundation, but a foundation is not required.
Common Applications
Structures built using this building technique have the potential to replicate the functionality of many types of buildings. Some common applications include:
- Garages
- Mancaves
- Storage sheds
- Barns (farm buildings)
- Horse barns
- Horse riding arenas
- Commercial buildings
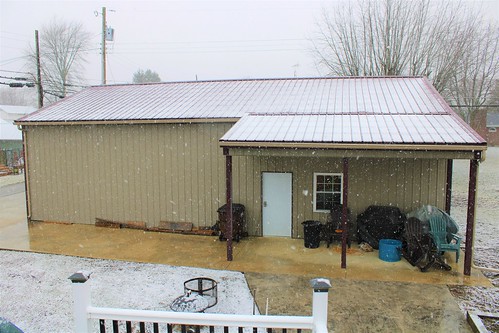
At DIY Pole Barns we offer pole building kits that can be fully customizable. Here’s an image of a commercial building from one of our customers:
And here’s an image of a garage (from one of our customerstoo!).
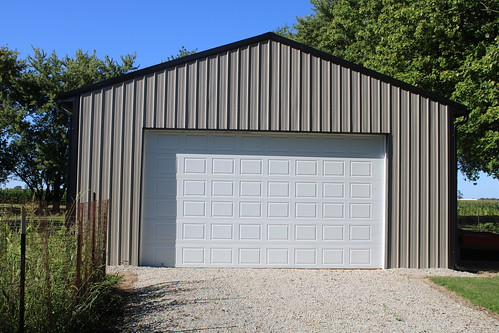
If you want to see more images like this, visit our Photo Gallery.
Advantages and Disadvantages
Pole building framing has a lot of advantages, but it also has some disadvantages to keep in mind.
Advantages
The advantages include:
Build Time
Pole barn structures are quick to build due to their simple design and lack of reliance on a foundation or basement compared to traditional building methods.
With pre-designed pole barn kits such as those offered by DIY Pole Barns, the construction process can often be completed in a matter of days, making it an excellent option for those looking to save time.
Cost-Effectiveness
Using fewer materials and requiring less labor, pole building framing is significantly more affordable than traditional construction methods.
Structural Integrity
Buried poles provide excellent stability and strength, enabling pole barn structures to withstand harsh weather conditions when built and prepared properly, including strong winds and heavy snow.
Versatility
Pole barns can be adapted for many purposes, including farm buildings, workshops, garages, and even commercial buildings. Its open interior design allows for flexible use of space, making it ideal for customized layouts and future modifications.
Take a look at our custom pole barn kitsto explore your options!
Extra Space
The absence of interior walls creates a spacious interior, perfect for storing large equipment, vehicles, or livestock. This open layout maximizes usable space.
Easy to Insulate
The simple design of pole barns makes them easy to insulate, helping to maintain energy efficiency and comfort.
Disadvantages
Some potential downsides to consider include:
Lifespan
While pole barn structures are durable, they may not last as long as buildings constructed with traditional methods. The lifespan of a pole barn can vary depending on maintenance, materials used, and environmental factors, often ranging between 40 and 60 years.
However, while 40 to 60 years is considered a safe estimation, a properly maintained pole barn built with high-quality materials can last over 100 years.
Codes and Regulations
Post-frame construction must adhere to local building codes and regulations, which can vary widely by region. Obtaining permits and ensuring compliance with local laws may require additional time and effort during the planning phase.
Rotting
The wooden poles used in this building technique are susceptible to rotting over time, particularly if they are not treated or properly protected from moisture.
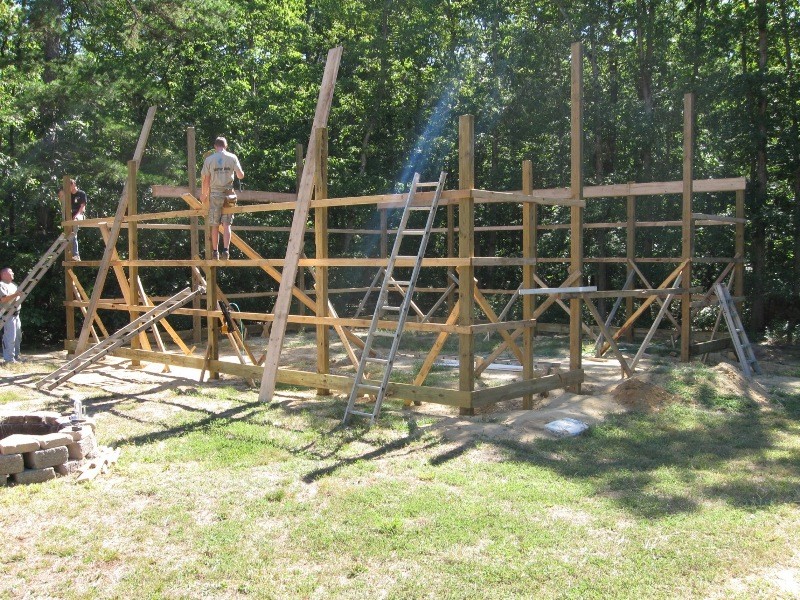
Pole Barn Framing Components
Pole barn framing relies on several key components working together to create a strong and functional structure.
Here’s an image of a pole barn under construction of one of our customers for reference:
Footing/Foundation
The footing or foundation provides stability for the entire structure. Typically, poles are anchored to the ground or to an existing foundation. Local building codes usually indicate the type of foundation required for these types of buildings.
Posts
Posts are the vertical supports that bear the weight of the roof and provide stability to the whole construction.
Girts
Girts are horizontal wooden boards attached to the posts. They provide additional structural support, reinforcing the stability of the building and making it easier to attach walls to the internal side of the structure.
Trusses
Trusses are triangular frames that support the roof. They span the width of the pole barn, evenly distributing the weight of the roof and ensuring structural integrity.
Purlins
Purlins are horizontal beams placed on top of the trusses, providing additional support for the roof panels.
Skirt Board
The skirt board is a horizontal board installed along the base of the walls. It protects the building from water damage and provides additional structural integrity.
Siding
Siding forms the exterior walls of the pole barn and is typically made of metal, wood, or vinyl. It provides weather resistance and insulation.
Roofing
The roof offers protection from the elements. Metal roofing is often preferred for its durability, ease of installation, and low maintenance.
Fasteners
Fasteners such as screws, nails, and bolts hold the components together. High-quality, corrosion-resistant fasteners are essential to ensure the longevity and stability of the structure.
Factors That Affect The Cost of Your Construction
Several factors influence the overall cost of a pole barn.
Size
The size of your pole barn directly impacts the cost. Larger buildings require more materials, labor, and time to construct, which increases expenses. On the contrary, smaller structures are more affordable.
Materials
The quality of materials can increase expenses, however, this is a factor that no one should sacrifice as it directly impacts the lifespan of your building.
Labor
Labor costs depend on whether you hire professionals or complete the project yourself. DIY projects save on labor but may require more time and effort. Hiring experienced contractors ensures efficiency but increases the overall budget.
Additional Features
Adding additional features can raise the cost significantly. These enhancements improve functionality and aesthetics but require extra materials and labor during installation.
Location
The location affects everything from the cost of materials to labor rates. Some areas may incur higher transportation fees, while some locations may have costly permitting fees that add to the overall cost.
Step-by-Step Pole Building Framing Guide
Here’s a step-by-step pole building framing guide.
1. Prepare the Site
Start by clearing the site of any rocks, roots, or debris that could interfere with construction. Level the ground to create a stable base for your pole barn. Once the site is prepared, mark the exact positions where the poles will be placed, following your building plans.
2. Set the Posts
Set the poles according to your design and local building codes. You can either bury them directly into the ground (at least 3 to 5 feet deep) or anchor them onto a concrete foundation.
Whichever method you choose, ensure the poles are perfectly vertical to maintain structural integrity.
Here’s a video from our YouTube channel on how to set posts properly:
3. Install Trusses
Secure the trusses onto the poles to create the roof’s framework. This step requires precision, as trusses provide critical support for the roof.
4. Attach Siding
Attach siding to the exterior of the structure. Ensure the siding is properly aligned and secured to protect the building from the elements.
5. Install the Roof
Place roof panels onto the trusses and secure them with fasteners.
6. (Optional) Flooring and Insulation
While not essential, adding flooring and insulation can increase the functionality and comfort of your pole barn. Concrete floors provide a durable surface, while insulation helps regulate temperature and reduces energy costs if the building is heated or cooled.
History of Pole Building Framing
Pole barn framing originated in the United States during the 1930s as a response to the challenges of the depression ongoing at the time in addition to the emergence of corporate farming.
Farmers, faced with the need for cost-effective and spacious agricultural buildings, began using utility poles as the primary support structures for horse barns and other farm buildings. As the technique evolved, specific materials were developed to enhance the convenience and affordability of pole barn construction.
Over the decades, this building method gained widespread popularity, becoming a versatile solution for various applications. Today, pole barns are used for more than just agriculture. They are built for garages, storage sheds, workshops, commercial spaces, and more.
Frequently Asked Questions
Learn more about pole building framing.
Is Pole Barn Framing Suitable for Residential Use?
Yes, this building method is a viable option for residential use. Its open design allows for flexible layouts, and with proper insulation and interior finishes, it can be turned into a comfortable living space. It is also a cost-effective alternative to traditional home construction.
How Deep Should I Bury My Pole Framing Posts?
As a general rule, pole framing posts should be buried at least 3 to 5 feet deep to ensure stability and proper protection against the elements.
Can I Attach Other Buildings to My Pole Barn?
Yes, it is possible to attach other buildings to your pole barn. Ensure the attachment is structurally sound and complies with local building codes for safety and durability.
Taking the Next Step
Now that you know what goes into pole barn framing, it’s time to take action. At DIY Pole Barns, we’ve got custom kits, pre-engineered plans, and a team ready to walk you through it all.
Call us at 800-622-4242 or use our Instant Quote Tool to get pricing tailored to your needs. Whether you’re dreaming big or starting small, we’re here to help you build it right. Let’s build something strong, smart, and built to last.
Until next time,
-Albert Barnwright
Tool Belt Tightener, Post Hole Ponderer